For VPN Setup on Mac OSX 10.5 to 10.13 Snow Leopard, Lion, Mountain Lion, Mavericks,
Yosemite, El Capitan, Sierra, High Sierra
Just watch the Video Tutorial below.
If Viewing on a Mobile device, switch to horizontal or scroll left to right.
Or Follow our step by step
guide below.
If Viewing on a Mobile device, switch to horizontal or scroll left to right.
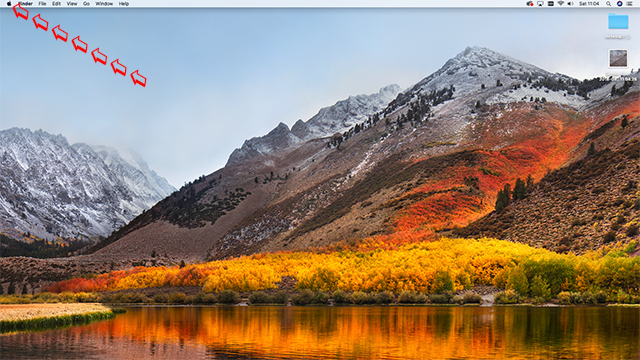
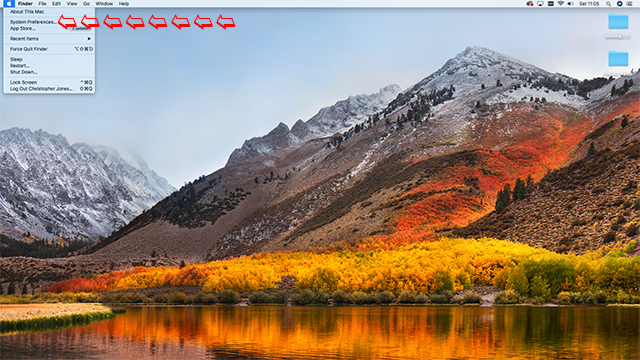
Click on the Apple Logo in the top left hand corner.
Select System preferences
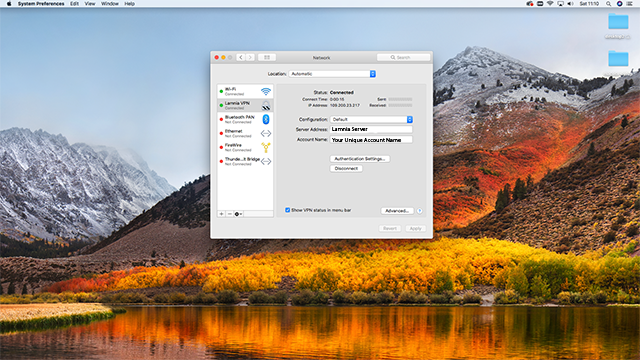
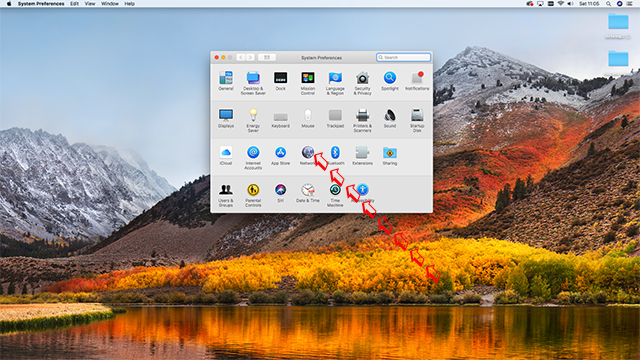
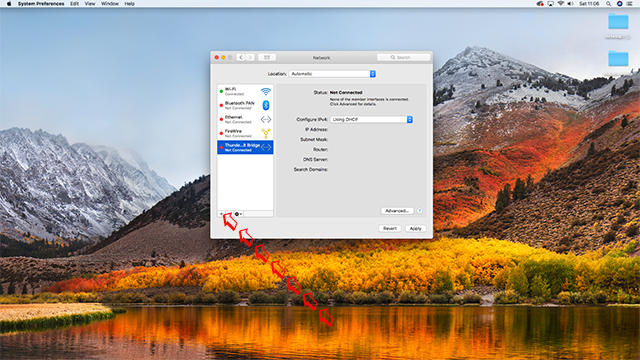
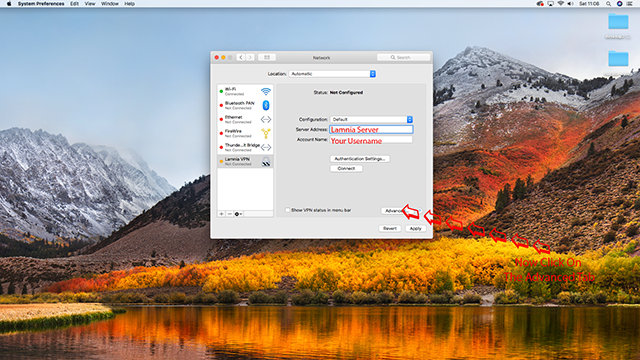
Now Click on Network
Click on the + in the bottom left hand corner.
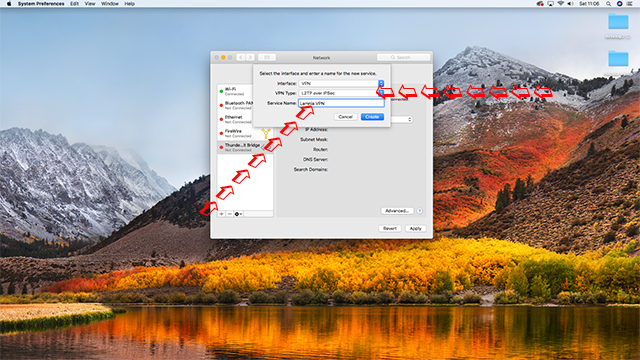
Click on drop down menu "Interface" and select VPN

In VPN Type, select L2PT over Ipsec. In Service name type " Lamnia VPN" Then Click Create
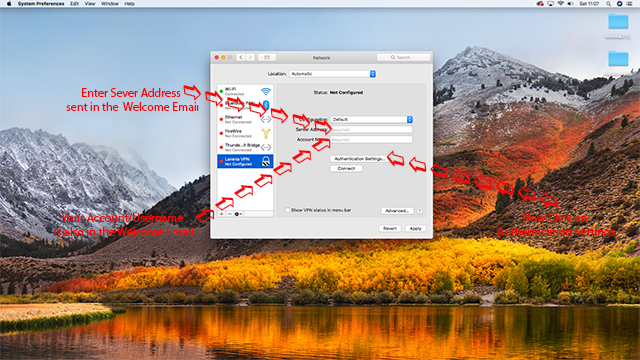
Once you sign up, we send you all setup details in a Welcome Email.
Enter the server address and Account Name. then click on Authentication Settings
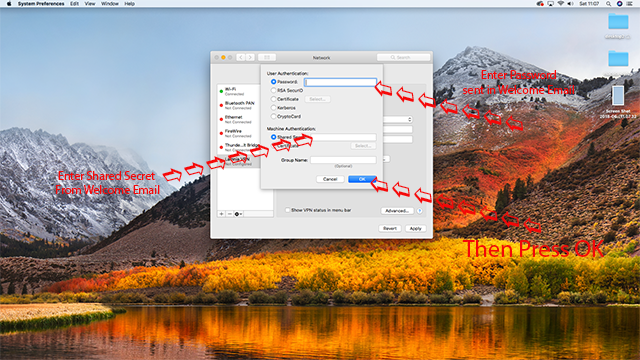
Now enter the password and secret ( sent in your Welcome Email ) Then Click OK
Now click on the Advanced Button
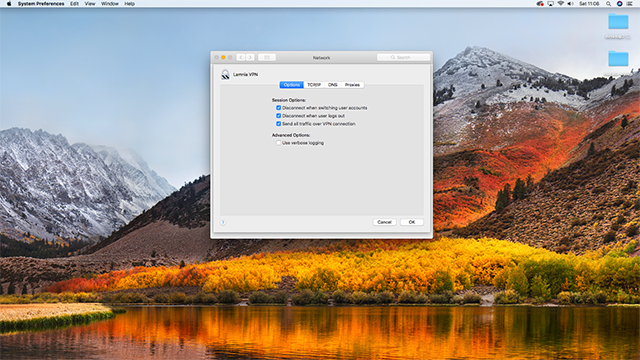
"Send all traffic over VPN connection" MUST be ticked. Then Press OK

Make sure "Send all traffic over VPN connection" is ticked before you click OK
Tick " Show VPN Status in Menu Bar" Then Click "Apply " Now you can Connect

If all correct "Connected" VPN will look like this.